TA-DA!!! I'm so pleased with how they turned out! It was a little iffy for a second whether or not they would fit, but even my midnight math skills are pretty good apparently. I'm kinda in the middle of transitioning our fall/winter stuff into our spring/summer stuff. The big geese picture in the before photos is part of our winter stuff. The empty frame is on it's way to becoming something colorful and fabulous. (Spoilers)
Ok, if you are not a total nerd like me, you might want to stop reading there... but I took lots and lots more pictures, and I want to post them!
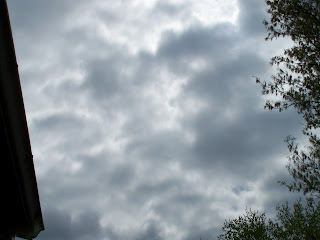
This is what the sky looked like for us all day... Which is not a bonus when you need to spray paint, BUT it never did rain, and I made it through. (YAY!)
Like pretty much everyone else who has made pipe shelves, I cleaned them
and spray painted them. Most people go for black, but I am not big on
black, so I went with gray. I used Painter's Touch, my absolute favorite
spray paint, and my spray paint gun attachment. This is the first time
I've used the gun thingie, and I will never do another project without
it! This is the first time I've spray painted without A. having a sore
pointer finger and B. being covered in spray paint.
OK, more pictures of my shelves (quick and dirty) styled up. This is "my" side. The top shelf has some of my favorite things, owls, driftwood, and a funky puzzle box. It also has the Laura George print Goggles. It was one of my first art purchases, because it reminds me of me and all the different glasses I've worn since Kindergarten. I bought her print Mustachios at the same time because it reminded me of Justin. (It's on "his" side) My second shelf needs some help, but for now it has a cool ceramic piece I picked up at a thrift store, one of my favorite sets of teacups, and two canisters from Delft Holland. I am really excited to finally have a good place for the All You Need is Love set I made Justin for Valentine's. The bottle collection all along the mantle is Justin's... he's been collecting them forever, and that is another thing I'm glad finally has a place.
This is Justin's side. The giant orange flame vase came free with our dining set forever and forever ago. On the top shelf you can see Mustachios. The ceramic cross piece is called Resurrection, and it was made for me by a friend in a ceramics class we took together. She made three Death, Burial, and Resurrection, and I was really honored when she gave me one. Justin's second shelf needs a little help too. (I had planned to put books on them, but now I'm not so sure.) The three bottles are from our wedding. The middle is our unity sand. (Try lighting a unity candle on the beach!) The other two are Jone's bottles with sand from the beaches where we were married and honeymooned. The piece next to them, I bought at a craft fair from a really sweet lady who actually went out and found the letters of the alphabet in her area. I really liked her eye, so I picked out RANEY. (Our last name for those of you just joining us.) Then more and more bottles... and this isn't even all of them.
This is my favorite view... it's like pipe shelf porn.
Here's the break down of what we did
- went to HD in the morning to buy everything
- cleaned the pipes and fittings
- put them together
- spray painted (1 coat primer, 2 coats paint)
- we left the shelves raw (poplar)
- assembled
- attached to the wall
- cleaned the shelves
- applied a wood cleaner
- styled them up


No comments:
Post a Comment